

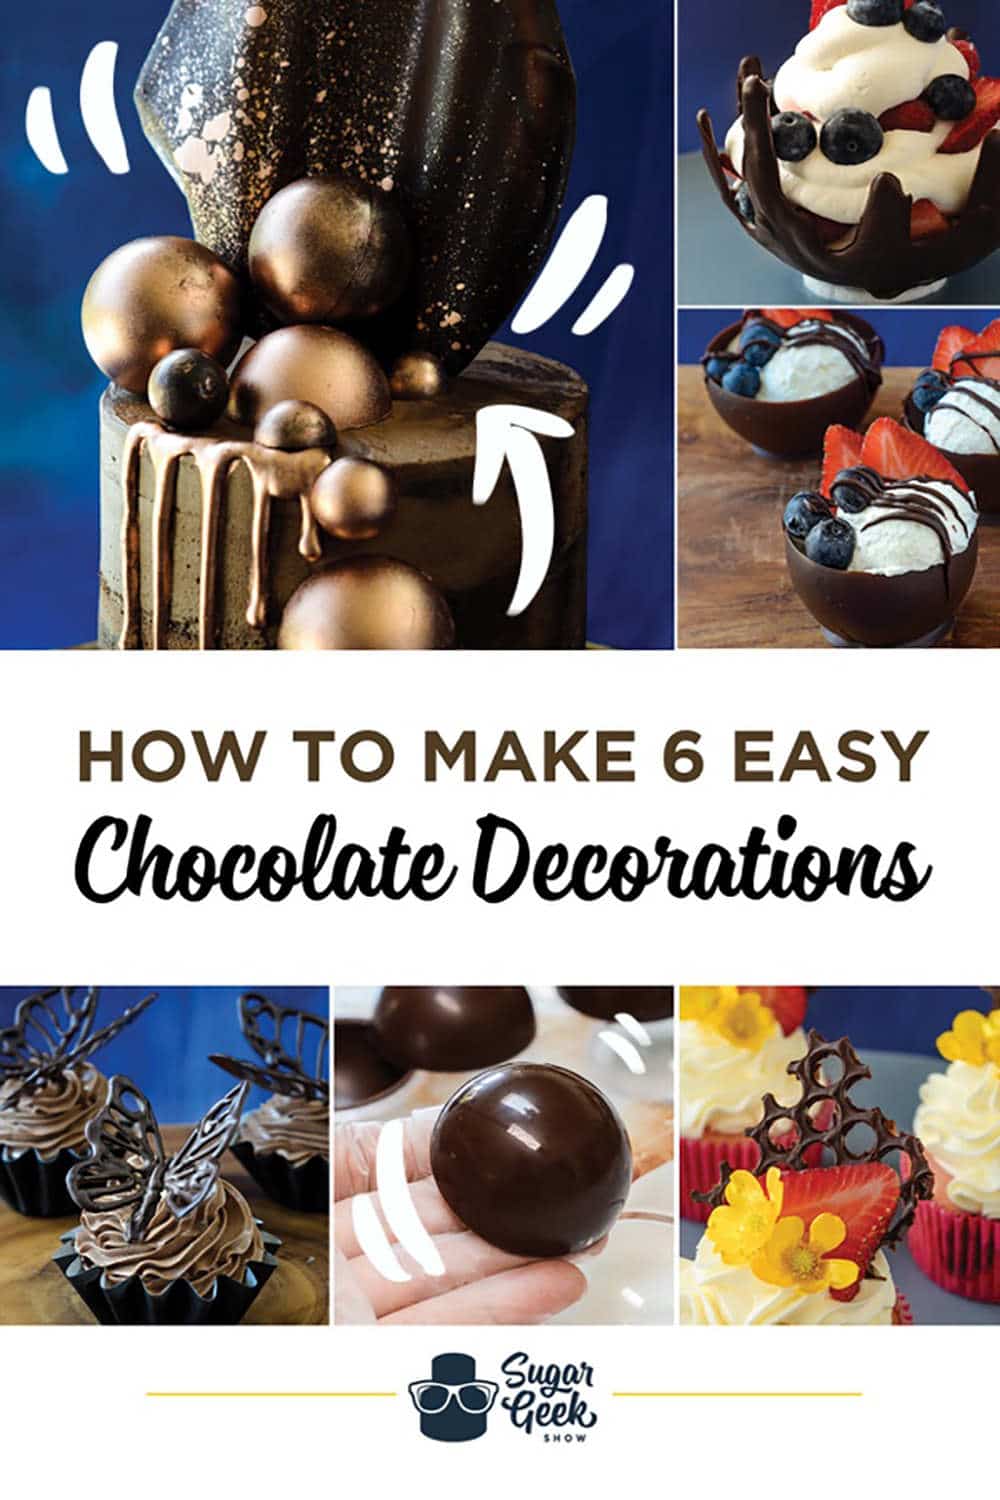
How To Make Hard Chocolate Cake Decorations
How to make six fun and easy chocolate decorations for your cakes or desserts
I love making chocolate decorations! Not only are they fun to make only they are so tasty! Chocolate decorations work best if you lot use tempered chocolate only if you don't want to temper chocolate you tin use chocolate wafers for nearly projects. If you lot've been wanting to effort your hand at some fun chocolate decorations for your cakes or desserts, you'll want to check these out!
*the post contains affiliate links which means I get paid a few pennies if y'all buy from my link but it doesn't cost you anything*
The all-time chocolate for chocolate decorations
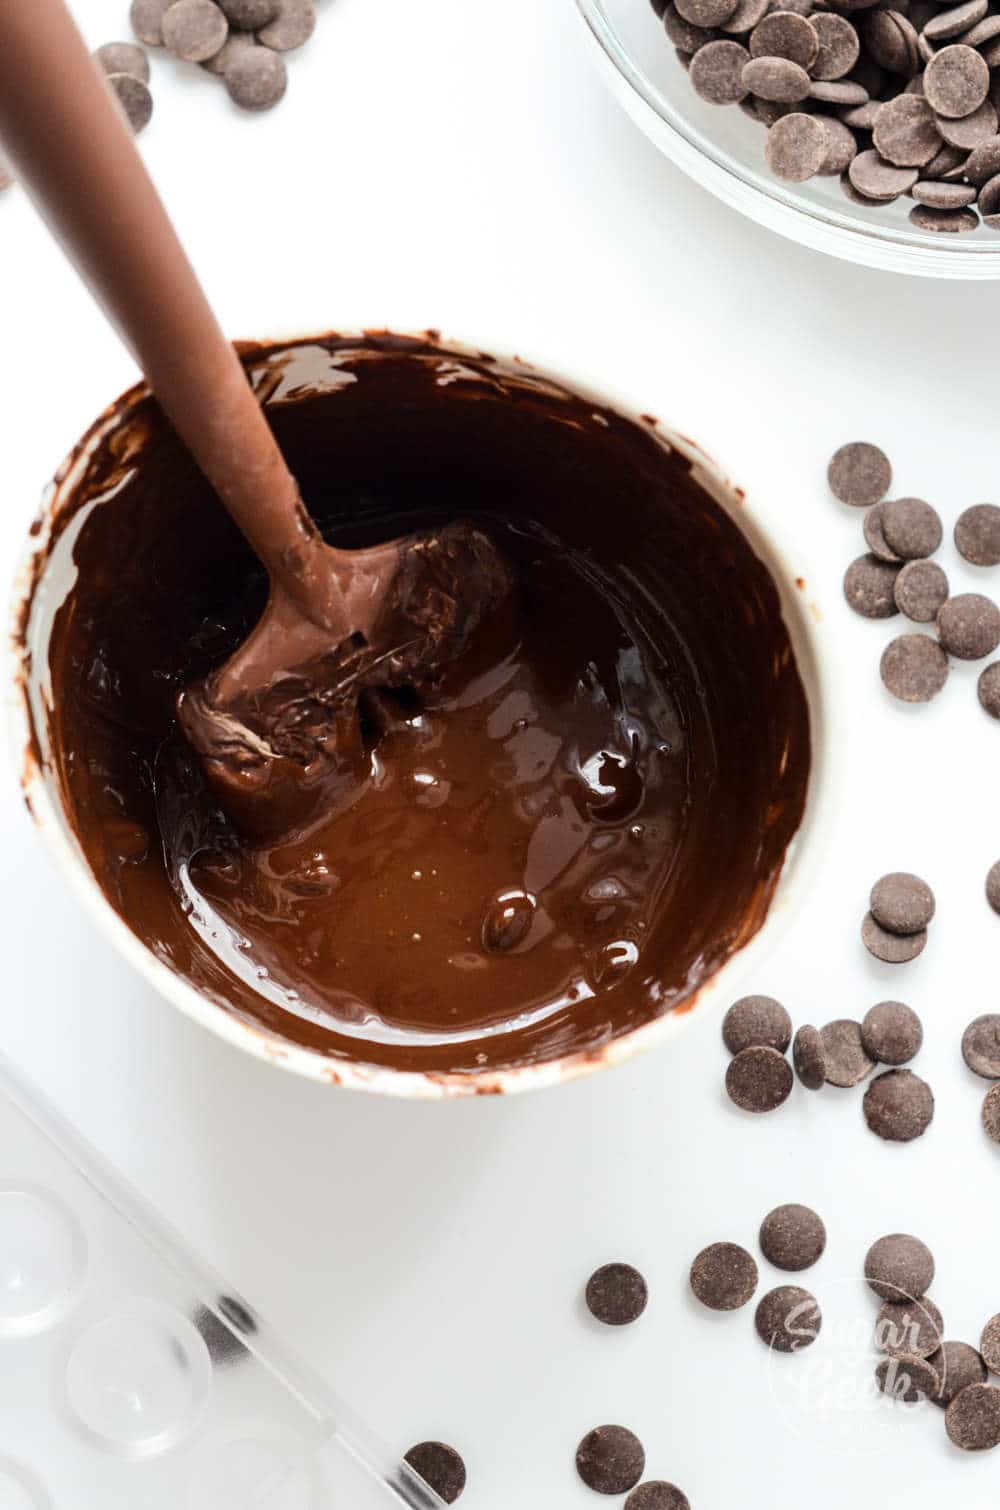
For these chocolate decorations, we will be using tempered chocolate at 86ºF which is the optimal working temperature. I apply a chocolate thermometer and a silicone mixing bowl to atmosphere my chocolate in the microwave. Quick and easy for these small projects!
If you don't want to atmosphere chocolate, you tin use compound chocolate. I like Guittard brand. If you want to colour your processed melts, you will have to use chocolate food coloring or you lot tin use pre-colored processed melts like the Wilton brand. Y'all can't use regular nutrient coloring to color chocolate.
What's the divergence between real chocolate and compound chocolate?
Real chocolate has cocoa butter in it and needs to exist tempered before you can use it in molds or for decorations. If you don't temper the chocolate, it will be soft, dull and lose information technology'south shape hands. Real chocolate melts at most body temperature and has a really swell season and snap when you bite into it.
Compound chocolate (like Wilton processed melts) sometimes referred to every bit coating chocolate, does not have cocoa butter in it. It might have some other fat substitute that doesn't require tempering. It has a much higher melting point, less expensive and is more stable in warm environments. The downside is that it doesn't gustatory modality as adept as real chocolate.
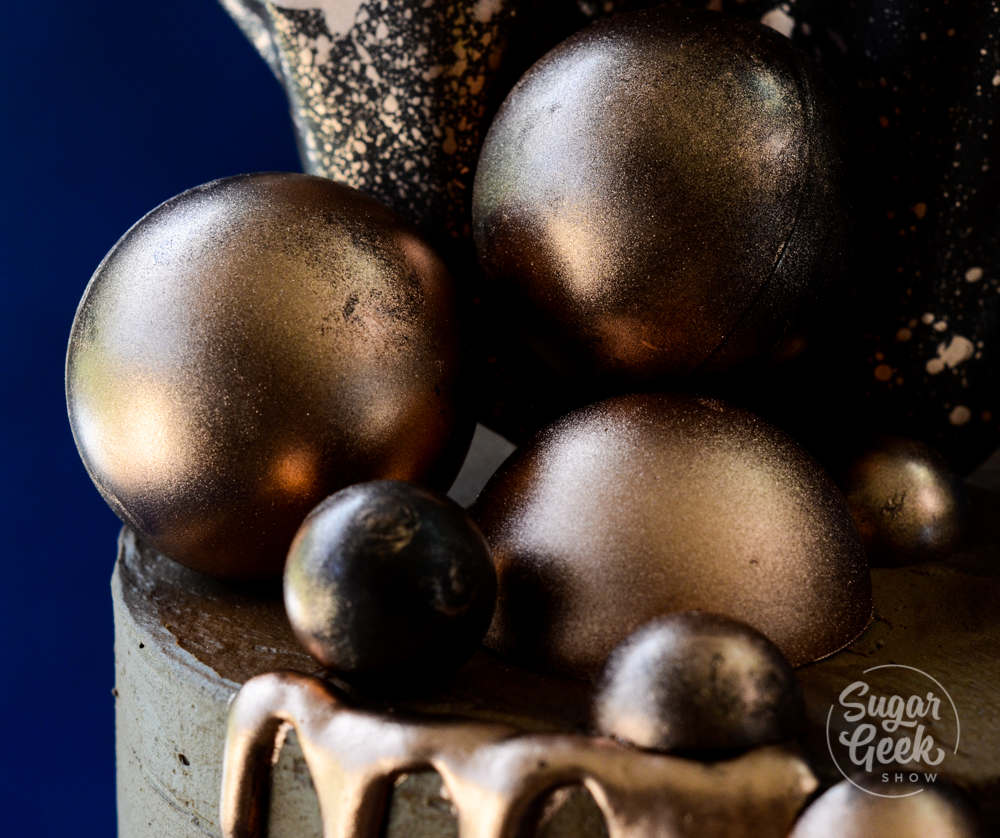
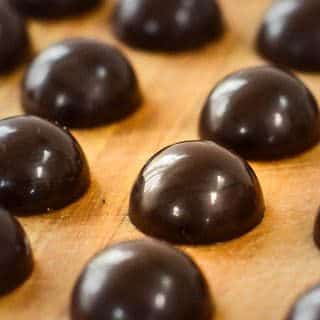
one. How To Brand Chocolate Sphere Decorations
Cakes with chocolate spheres are everywhere correct now. From colored swirls resembling planets to shiny metallics atop mod designs. Making a chocolate sphere tin be a super impressive topper.
To make chocolate spheres y'all are going to need some tempered chocolate and a polycarbonate sphere mold. If you don't want to bother with tempering chocolate you can utilize melting wafers and a silicone sphere mold. The melting wafers wont release from the polycarbonate mold. The reason I like using the polycarbonate mold is because the spheres are very shiny.
- Pour your tempered chocolate into your acrylic mold at 86ºF and scrape off the backlog chocolate with a bench scraper
- Tap the side of the mold to remove whatever air bubbling.
- After thirty seconds pour the chocolate out of the molds, tapping with your bench scraper to make the shells sparse.
- Identify the mold upside down on a piece of parchment newspaper for x-15 minutes until the chocolate is not liquid but not fully set.
- Scrape off the backlog chocolate to make a clean edge on the spheres.
- Identify the chocolates into the fridge for 10 minutes or until the chocolate release from the mold easily. Practise not freeze or you tin crusade condensation stains to announced on the chocolate.
- Place a block pan on summit of a bowl of hot water
- Melt the edges of each sphere slightly and and then press together with gloved hands.
- Wipe away any excess chocolate and allow to fully set.
- You tin can now paint your spheres or apply them equally is.
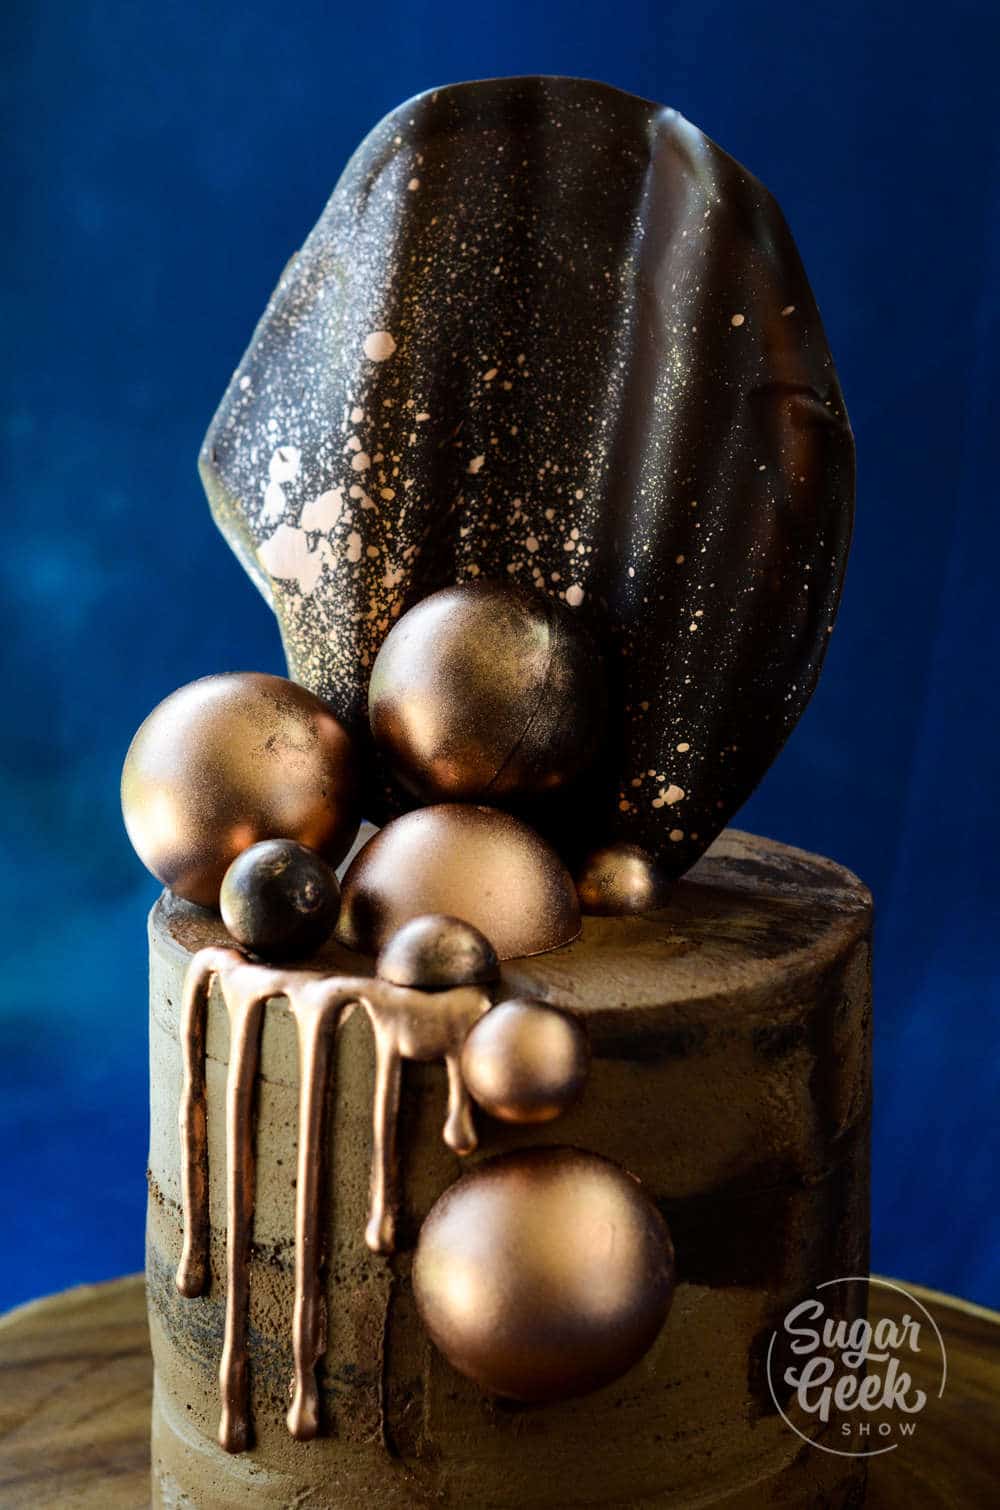
two. Chocolate Sail
Chocolate sails make a really stunning showpiece at the summit of your cakes! All you demand is a piece of parchment paper and some clothespins or clips of some sort.
- Spread a thin layer of tempered chocolate (86ºF) or candy melts onto a piece of parchment paper.
- Gather the edges at 1 side of the parchment newspaper and prune to secure
- Place parchment in the fridge for 10 minutes until set
- Remove the parchment from the dorsum of the chocolate carefully
- Clean up the edges of the chocolate if they are rough with a knife
- Now your sail is set to identify on superlative of your cake!
- I added some simple metallic splatters to my canvas using TMP copper and a chip of Everclear.
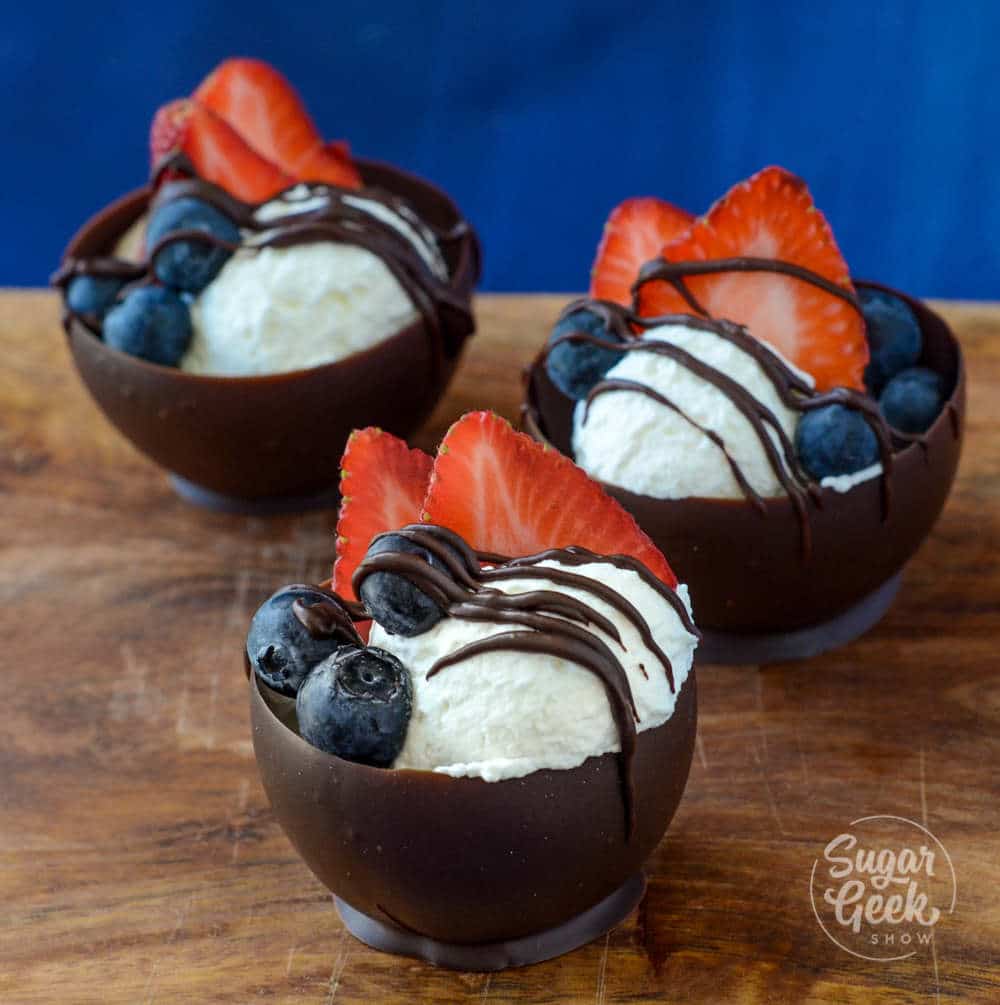
iii. Chocolate Cups
I get-go learned to make these chocolate cups in pastry school and loved how they turned out! They are a fun way to serve upwardly some chocolate mousse, water ice cream or other mini desserts. All you need are some water balloons, parchment paper and tempered chocolate or candy melts. You lot don't want to use regular balloons, they are too large and the chocolate does not release well from the chocolate.
- Blow upward your water balloons and tie the end to secure them.
- Place a slice of parchment paper on a cookie sheet to place your cups onto.
- Pour your tempered chocolate into a large bowl. The temperature should be 86ºF
- Dip your balloon into the chocolate and and then onto the parchment newspaper.
- Once you take all your balloons dipped, place the pan into the refrigerator for 10 minutes or until the chocolate has gear up.
- Popular the balloons with a pin and let the airship pull abroad from the chocolate naturally.
- Peel off the balloon and now your cups are ready to fill with delicious treats!
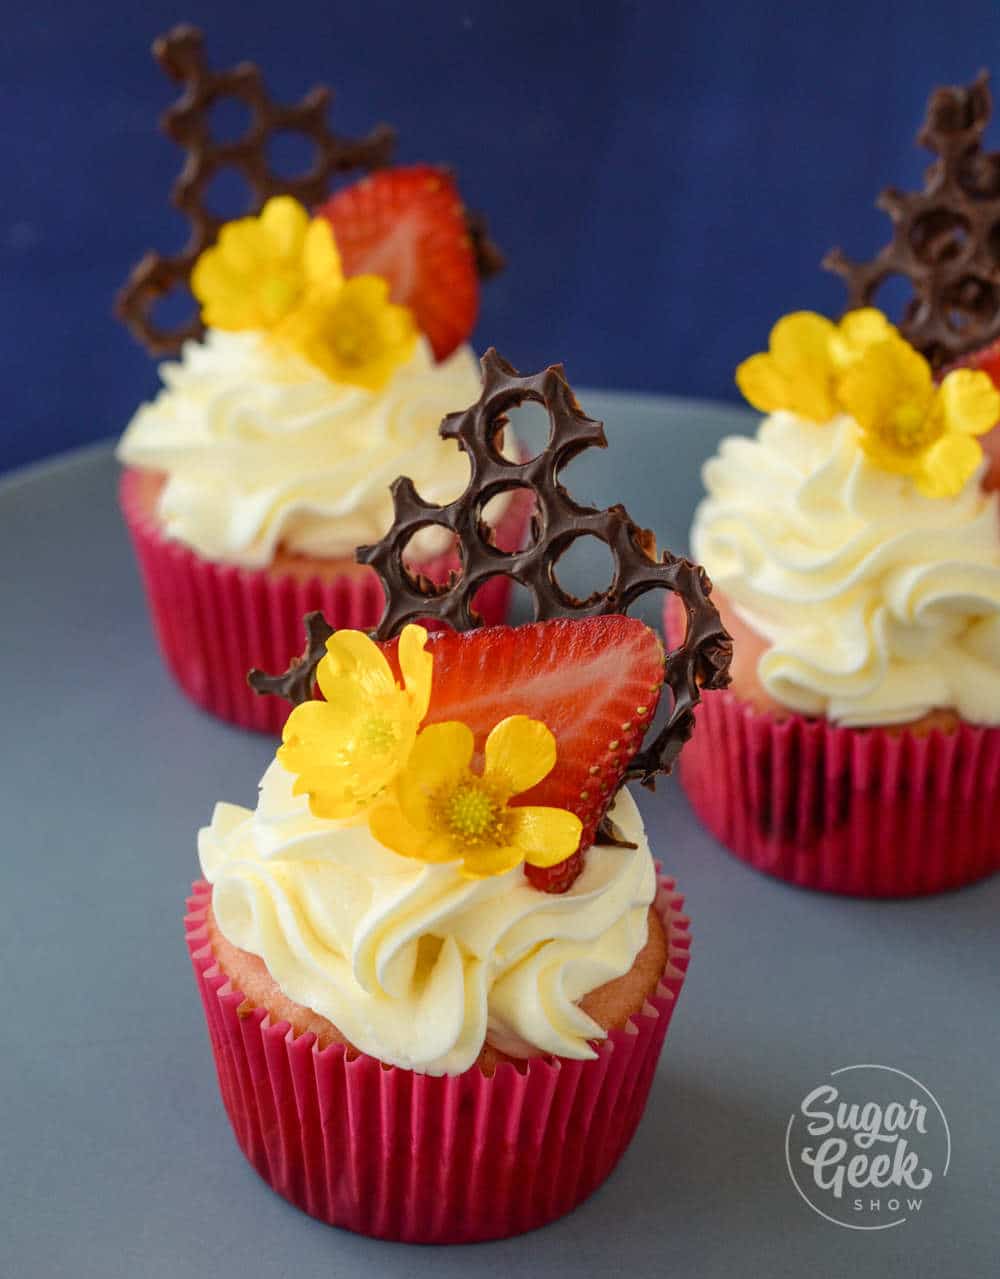
4. Chocolate Honeycomb decoration
I honey how these honeycomb chocolate decorations look on summit of cupcakes! All you demand is some bubble wrap (washed) and some tempered chocolate or melted candy melts.
- Spread some tempered chocolate (86ºF) or melted candy melts onto your bubble wrap.
- Polish the chocolate out. The thinner you lot spread it, the more than holes that volition be visible.
- Shake the bubble wrap to make the chocolate settle and smoothen out.
- Place the chimera wrap into the fridge for 10 minutes until set.
- Turn your chocolate upside down and gently pull off the bubble wrap.
- Now you lot can break up your honeycomb into pieces and decorate your desserts!
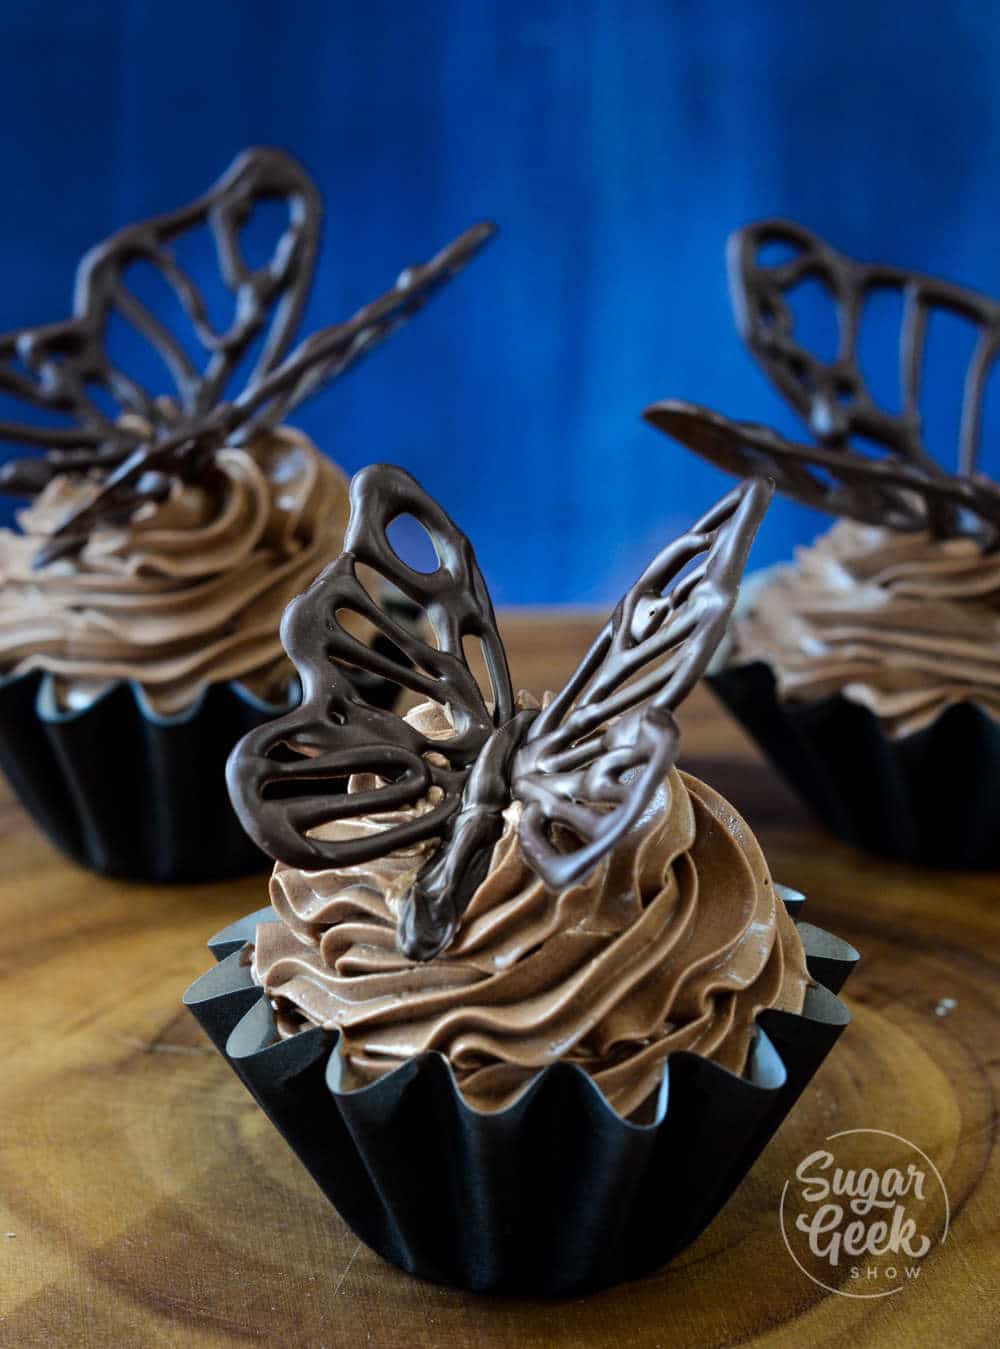
v. Chocolate Butterfly decorations
Chocolate butterfly decorations are SO impressive looking on top of your desserts! You lot tin even color the insides with more than colored melted chocolate after the outline has set. All you demand is my gratis chocolate butterfly template, some acetate or parchment paper, pipage handbag, and a thick book.
- Identify some of your tempered chocolate (86ºF) into a piping purse. Cut the tip of the bag off. Not too big, nigh the width of a toothpick.
- Print out your butterfly template and place your parchment paper or your acetate over the top. I taped mine downwardly onto a cookie sail keep information technology from wiggling effectually and to make it easy to pick upwards.
- Trace the outline of the wings (not the body) with your chocolate.
- Identify the chocolate in the fridge for 10 minutes to let it set.
- One time your wings are set, carefully remove the wings from the acetate. Fold the acetate in half and place in the middle of a thick volume (see video for demo).
- Place the wings on either side of the crease and pipe some more chocolate in between the wings to be the body.
- Chill once over again until the chocolate is gear up.
- Your butterflies are now ready to exist placed on cupcakes or a cake!
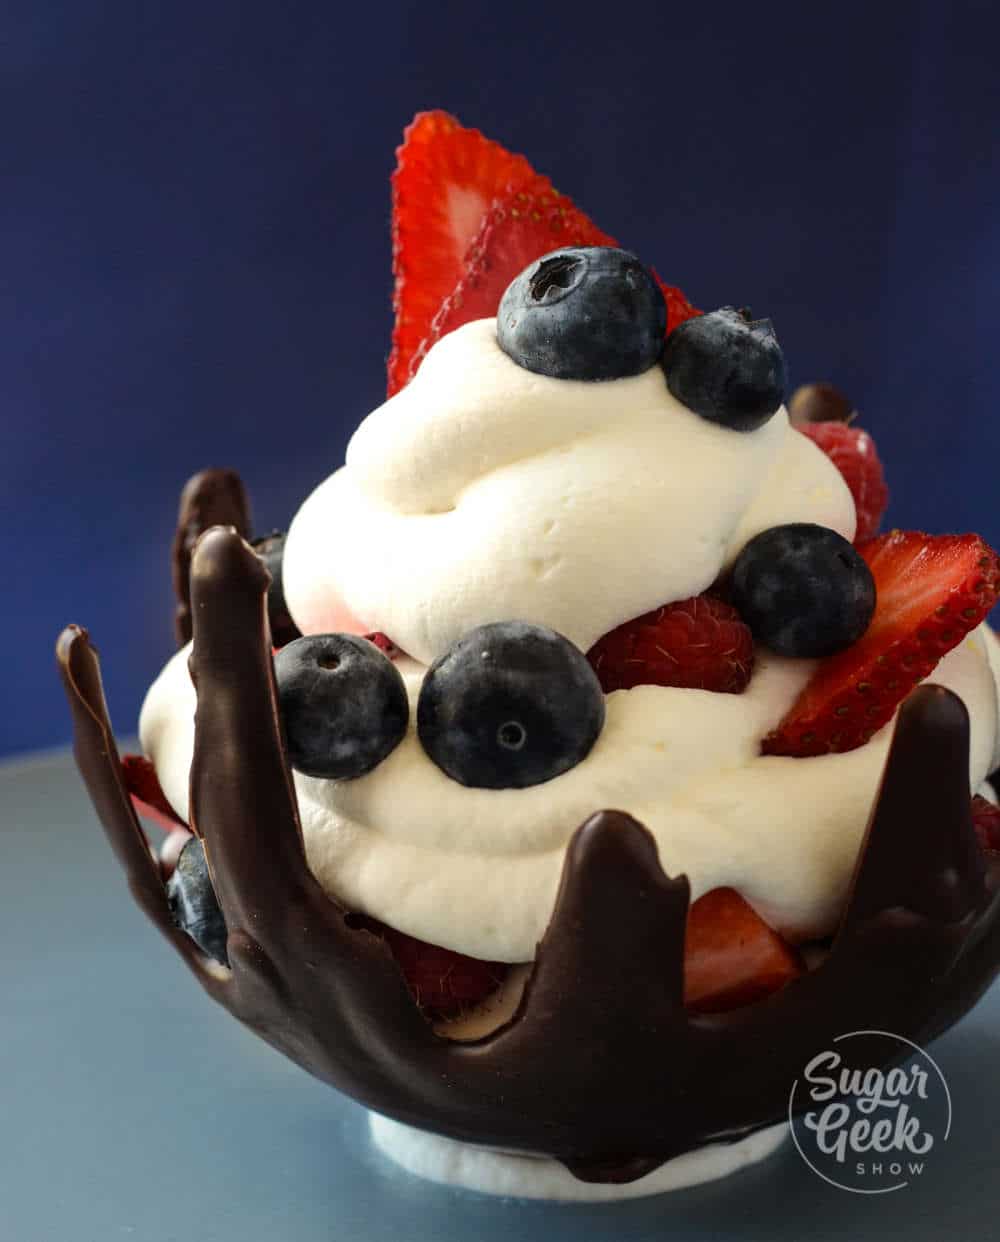
6. Chocolate Dessert Bowl
This drippy chocolate basin decoration is a great centerpiece for a dessert table. Fill the inside with heaps of whipped foam and fruit or ice cream and cake! Share the dessert and in the end, you can eat the bowl too!
- Inflate a regular sized balloon and place it in a basin or cup upside downwardly to continue it steady.
- Place some plastic wrap over the top of the balloon.
- Place your tempered chocolate (86ºF) or processed melts into a pipage bag and pipe over the elevation of the plastic wrap.
- It'southward ok to allow some of the chocolate drip down the sides.
- Place the airship into the fridge to set for 10 minutes.
- Carefully remove the balloon and plastic wrap from the chocolate.
- Your chocolate decoration is now set to to be filled with sweet treats!
I hope yous enjoyed learning how to make these chocolate decorations! Every bit always you can inquire me questions in the comments if something isn't clear. If you lot tried this tutorial, let me know!
Did Yous Make This Recipe? Leave a rating and tell me how it went!
How To Atmosphere Chocolate
Hands atmosphere chocolate in the microwave! The easiest way to temper pocket-size amounts of chocolate.
Print Rate Never Miss A Cake
Serves: 12 oz
Calories: 144 kcal
Ingredients
- 12 oz (340 yard) chocolate must incorporate cocoa butter
Instructions
Tempering Chocolate Instructions
-
Place your chocolate in a plastic or silicone bowl in the microwave and estrus on loftier for 30 seconds. And then stir
-
Oestrus again for another thirty seconds, stir, so 15 seconds, stir, and so x seconds, stir. Make certain your temperature never goes above 90ºF for night chocolate. 86F for milk chocolate and 84F for white chocolate. Do Non RUSH THIS
-
If your chocolate is non fully melted then only practise another 5 seconds until information technology is melted
-
Now your chocolate is in temper and prepare to apply!
Notes
To learn more nearly tempering chocolate, check out Chef Christophe's tutorial on tempering chocolate with cocoa butter and an easy tempering automobile.
Diet
Calories: 144 kcal (7%) | Carbohydrates: 17 g (6%) | Protein: i thou (2%) | Fat: ten k (xv%) | Saturated Fat: 6 m (30%) | Sodium: 5 mg | Potassium: 82 mg (2%) | Cobweb: ii g (eight%) | Sugar: fifteen g (17%) | Calcium: 7 mg (1%) | Iron: 0.8 mg (four%)
Source: https://sugargeekshow.com/news/6-easy-chocolate-decorations/
Posted by: dinhmrsecone.blogspot.com
0 Response to "How To Make Hard Chocolate Cake Decorations"
Post a Comment